
If you work with Kubernetes or microservices, you may have heard of Istio. But what exactly is Istio, and why is it becoming so popular? In this blog post, we’ll explain Istio in simple terms, explore its features, and discuss the benefits it brings to modern applications and sample application deployment.
What is Istio?
Istio is an open-source service mesh that provides advanced networking capabilities for managing microservices. A service mesh is a layer that handles communication between services in your application, enabling you to monitor, secure, and optimize traffic without changing your application code.
With Istio, you can:
- Control how requests flow between services.
- Observe traffic patterns and troubleshoot issues.
- Secure communication with encryption and access policies.
- Introduce resiliency features like retries and timeouts.
Key Components of Istio
As of the latest version 1.24.2, Istio consists of the following core components:
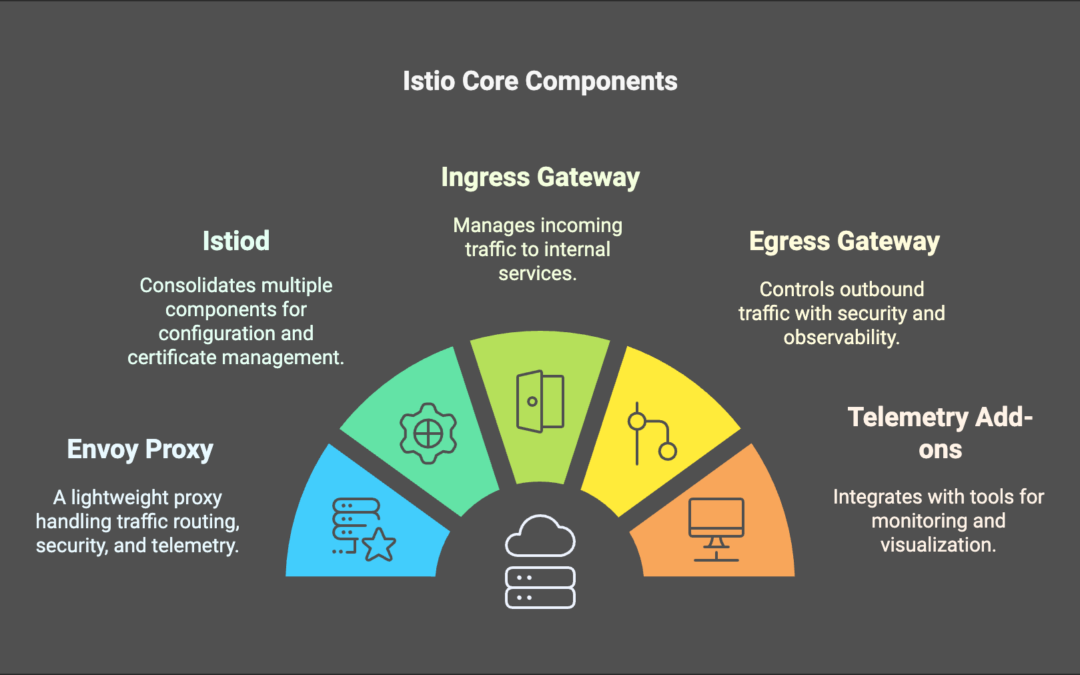
- Envoy Proxy: A lightweight, high-performance proxy deployed alongside your services as a sidecar. It handles traffic routing, security, and telemetry.
- Istiod: Replaces multiple older components (like Pilot, Citadel, and Galley) into a single binary. Istiod manages configuration, service discovery, and certificate issuance.
- Ingress Gateway: Manages incoming traffic from outside the cluster and routes it to internal services.
- Egress Gateway: Controls outbound traffic leaving the mesh, providing enhanced security and observability.
- Telemetry Add-ons: Integrations with tools like Prometheus, Grafana, and Jaeger for monitoring, visualization, and tracing.
- Control Plane: The central management hub that configures and manages proxies and enforces policies.
Why Use Istio?
Istio simplifies the challenges of managing microservices and provides the tools you need to run applications at scale. Here are some key reasons to consider using Istio:
1. Traffic Management
With Istio, you can control how traffic flows between your services. For example:
- Load Balancing: Distribute traffic evenly across instances.
- Traffic Splitting: Gradually shift traffic from one version of a service to another for canary deployments.
- Traffic Mirroring: Duplicate traffic to test new versions without affecting users.
- Fault Injection: Simulate failures to test resiliency.
2. Observability
Istio provides deep insights into how your services interact:
- Metrics: Get detailed performance data.
- Tracing: Track requests across multiple services.
- Logging: Capture and analyze traffic logs.
These features help you identify and resolve issues faster.
3. Security
Istio enhances security by:
- Encrypting communication between services with mutual TLS.
- Enforcing fine-grained access control policies.
- Authenticating users and services.
4. Resilience
Istio makes your application more robust with:
- Retries: Automatically retry failed requests.
- Timeouts: Prevent long-running requests from blocking your system.
- Circuit Breakers: Stop sending requests to failing services temporarily.
Advantages of Istio
- Decoupled Architecture: Manage service interactions independently of your application code.
- Consistency: Apply consistent policies and traffic rules across services.
- Scalability: Easily handle large, dynamic microservices architectures.
- Extensibility: Integrate with other tools like Prometheus, Grafana, and Jaeger for enhanced monitoring and visualization.
- Community Support: As an open-source project, Istio has a vibrant community that regularly adds new features and improvements.
How to Install Istio
Installing Istio is straightforward. Here’s how you can do it step by step:
Step 1: Download Istio
Download the latest Istio release using the following command:
curl -L https://istio.io/downloadIstio | sh -
This will download and unpack Istio to a directory named istio-<version>.
Step 2: Add istioctl to PATH
Navigate to the Istio directory and add istioctl to your system PATH:
cd istio-<version>
export PATH=$PWD/bin:$PATH
Step 3: Install Istio on Kubernetes
Run the following command to install Istio in your Kubernetes cluster:
istioctl install --set profile=demo -y
This will install Istio with the demo configuration, which is suitable for testing and exploration.
There are different profiles available in Istio:
demo: Ideal for testing and exploration.minimal: A lightweight setup for resource-constrained environments.default: A balanced, production-ready configuration.custom: Allows advanced configurations tailored to your specific needs.
Step 4: Enable Istio Injection
Enable automatic sidecar injection for a namespace:
kubectl label namespace default istio-injection=enabled
This ensures that Envoy sidecars are automatically added to your pods.
Sample Example: Traffic Splitting
Let’s see how Istio can be used to split traffic between two versions of a service.
Step 1: Deploy Two Versions of an Application
Create deployments for v1 and v2 of a sample application:
# Deployment for v1
apiVersion: apps/v1
kind: Deployment
metadata:
  name: app-v1
spec:
  replicas: 1
  selector:
    matchLabels:
      app: my-app
      version: v1
  template:
    metadata:
      labels:
        app: my-app
        version: v1
    spec:
      containers:
        - name: app
          image: my-app:v1
# Deployment for v2
apiVersion: apps/v1
kind: Deployment
metadata:
  name: app-v2
spec:
  replicas: 1
  selector:
    matchLabels:
      app: my-app
      version: v2
  template:
    metadata:
      labels:
        app: my-app
        version: v2
    spec:
      containers:
        - name: app
          image: my-app:v2
Apply both manifests:
kubectl apply -f app-v1.yaml
kubectl apply -f app-v2.yaml
Step 2: Create a VirtualService
Define a VirtualService to route 80% of traffic to v1 and 20% to v2:
apiVersion: networking.istio.io/v1alpha3
kind: VirtualService
metadata:
  name: my-app
spec:
  hosts:
    - my-app
  http:
    - route:
        - destination:
            host: my-app
            subset: v1
          weight: 80
        - destination:
            host: my-app
            subset: v2
          weight: 20
Apply the VirtualService:
kubectl apply -f virtualservice.yaml
Step 3: Verify Traffic Splitting
Send requests to the service and observe how traffic is distributed between v1 and v2:
kubectl logs -l app=my-app -l version=v1
kubectl logs -l app=my-app -l version=v2
You should see approximately 80% of requests handled by v1 and 20% by v2.
When Should You Use Istio?
Istio is particularly beneficial if you:
- Manage multiple microservices that interact frequently.
- Need advanced traffic routing and observability.
- Want to enhance the security and reliability of your application.
- Plan to scale your application to handle more traffic.
If you’re running a small application with a few services, Istio’s complexity might not be worth it. However, for larger systems, it’s a game-changer.
Conclusion
Istio is a powerful tool for managing microservices in Kubernetes. It provides traffic control, observability, security, and resilience, making it easier to build and maintain scalable, reliable applications. While Istio has a learning curve, its benefits far outweigh the effort for medium to large-scale applications.
Start exploring Istio today and take your microservices architecture to the next level!